I was very lucky to receive a Solid State Drive (SSD), a splendid present from a group of friends to mark a milestone Birthday. It was an OCZ Agility III 240GB drive, which I wanted to install inside my main machine as the system drive, however I was not so keen at the prospect of having re-install my Windows 7 Operating System.
Fortunately, some while ago I bought a marvelous piece of backup software that my Father had found called Image For Windows from Terabyte Unlimited. It is a chargeable product however it has saved both my Father’s bacon and my own on a couple of occasions, and would prove to be most useful with this latest challenge.
My machine has RAID10 data disks, but my OS was on a single disk which is a 1GB drive with the OS on one partition on that drive. The challenge was that I was going from a 1GB Hard Disk Drive System Partition to 240GB partition SDD, so I needed a product that would compact the old system partition drive before backing it up. Image For Windows had the ability to Compact the drive before you back it up, but if you are trying to Compact the drive while booted from it, it won’t work. You need to boot from a rescue CD which then allows the system drive to be compressed.
I had to create a recovery CD, I use to use BartPE which was a Win XP based CD bootable OS, however now Terabyte provides the files and scripts in order to produce a WinPE Windows 7 based image with the Image for Windows built in, using Microsoft Windows Automated Installation Kit (WAIK). I used the following article http://www.terabyteunlimited.com/howto/tbwinpe_tutorial.htm which created my Windows 7 Image For Windows Recovery Disk. If you have new hardware you might need to add additional SATA driver support, Appendix 5 of this article document this.
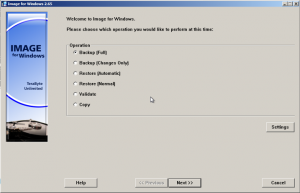
Booting the machine into the recovery disk provided me with the familiar screen :
Selecting backup you are then asked for the drive you wish to back up :
I selected the system drive and before clicking next I clicked the Compact button (see highlighted above). The Compact button then reorganises the partition so that a restored backup from a large disk should fit adequately onto a smaller disk. This process takes a little while, after which you are provided with the option of backing up to an external drive. Once this was backed up I then shut the machine down and proceeded to swap system drives.
Once my new SSD was install, I again booted up using the Image For Windows Recovery Disk. I then proceeded to restore the image from the backup onto the disk, and selected the option Fit Image To Target. Image For Windows proceeded to restore my backup image onto the new SSD. Once finished I then just allowed the OS to boot up without any problems. I did the usual checks e.g. make sure TRIM is enabled :
fsutil behavior query DisableDeleteNotify
should return zero if enable and 1 if disabled. I also checked if the OS had disabled defrag option for this drive which it had.
All I can say is the machine boots up in 12 seconds and after logging on is fully loaded in less than a second, these SSD are very impressive. Solved!


